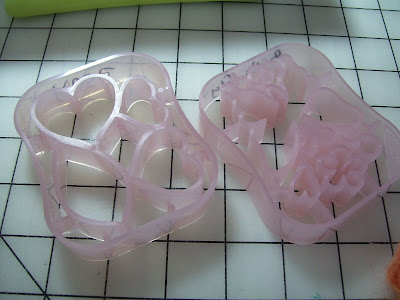
 Then of course, you need the pen style felting tool above. (I already had the felting mat). If you are going to applique directly to fabric, place your fabric on top of the mat, then put the mold there. Fill the shapes with wool roving and needle according to the directions you get with the mold, very simple and very quick.
Now if you want to make your shape 3-D, then instead of fabric, you put a piece of computer paper on the mat, then the mold, and then needle as directed. When done you just peel the shape off the paper. The paper below is what I used when making a rose.
 Can you see the dent I made in the wool roving??? Ha! neither can I. I think it's just like fabric scraps....multiplies in the drawers..LOL!!
 But after I was done, this is what I had. A pretty rose, complete with leaves, and a butterfly! I think I'll do a little beading on them, and sew broach pin backs to them.
 Can you see the dent I made in the wool roving??? Ha! neither can I. I think it's just like fabric scraps....multiplies in the drawers..LOL!!
 But after I was done, this is what I had. A pretty rose, complete with leaves, and a butterfly! I think I'll do a little beading on them, and sew broach pin backs to them.


 Quilter Blogs & Store Search
That's a darned cool tool!
ReplyDeleteLooks interesting but I think I am going to leave it to you. I don't need another project to fill my space and time with.
ReplyDeletei can see loads of possibilities with the felting molds. thanks for the heads up!
ReplyDeleteRuh roh, I think I'm gonna go shopping. lol. I think those 3D felted shapes are just about the coolest things since sliced bread! You are a bad influence on me! ;-)
ReplyDeleteThat's really neat - I esp. like the rose....I've been wanting to play with the needle felting but haven't had time.
ReplyDeletedo u and mary ever sleep? lol thats so cool:)
ReplyDelete